Introduction.
This page describes a course timing system (cts), a system used in timing participants running through a course with a number of check points called controls. The uses we are most familiar with are in orienteering and ARDF events. In ARDF events, the control are also called foxes. And, since we intend to use the system mostly in ARDF events, I'll often call the controls foxes.
We started development of this cts in December 2016. It was designed around the 13.56 MHz RFID system for which there is much open source hardware and information available. Mostly, it was developed for the Chapel Hill-Carrboro City Schools ARDF events. We expect to start using it some time in the spring of 2017.
The cts is composed of two types of boxes, a fox box and a master box. The fox box writes a control number and a time to an RFID card placed over the box. The master box can act a a fox box but it can also download information from an RFID card and display it on an LCD. It can also wipe the RFID card of all information.
We currently (2017-03-02) have only on fox box and one master prototype built and partially tested. Both use the Arduino IDE to compile and upload the software. We're waiting for an OSH Park PCB order to build more fox boxes. The information described on this page shows information about the prototype (version 1). The OSH Park PCB are for version 2 of the fox boxes. The document I will use during the build of version 2 fox boxes can be downladed here: cts control box v2 (2017-03-01). It's not complete yet but it has the schematic and layout.
Below here, I'll describe what we have already built. This page will change as the project develops.
The fox box.
The fox box is pretty simple. It has an RFID card reader/writer. There is a real time clock (RTC). There are some switches to set the control number for the box. There are three LEDs and a piezo buzzer. When a card is placed on the box, the control number and time are written to the card. The microcontroller it uses is the Adafruit Pro Trinket, 3.3 V, 12 MHz.
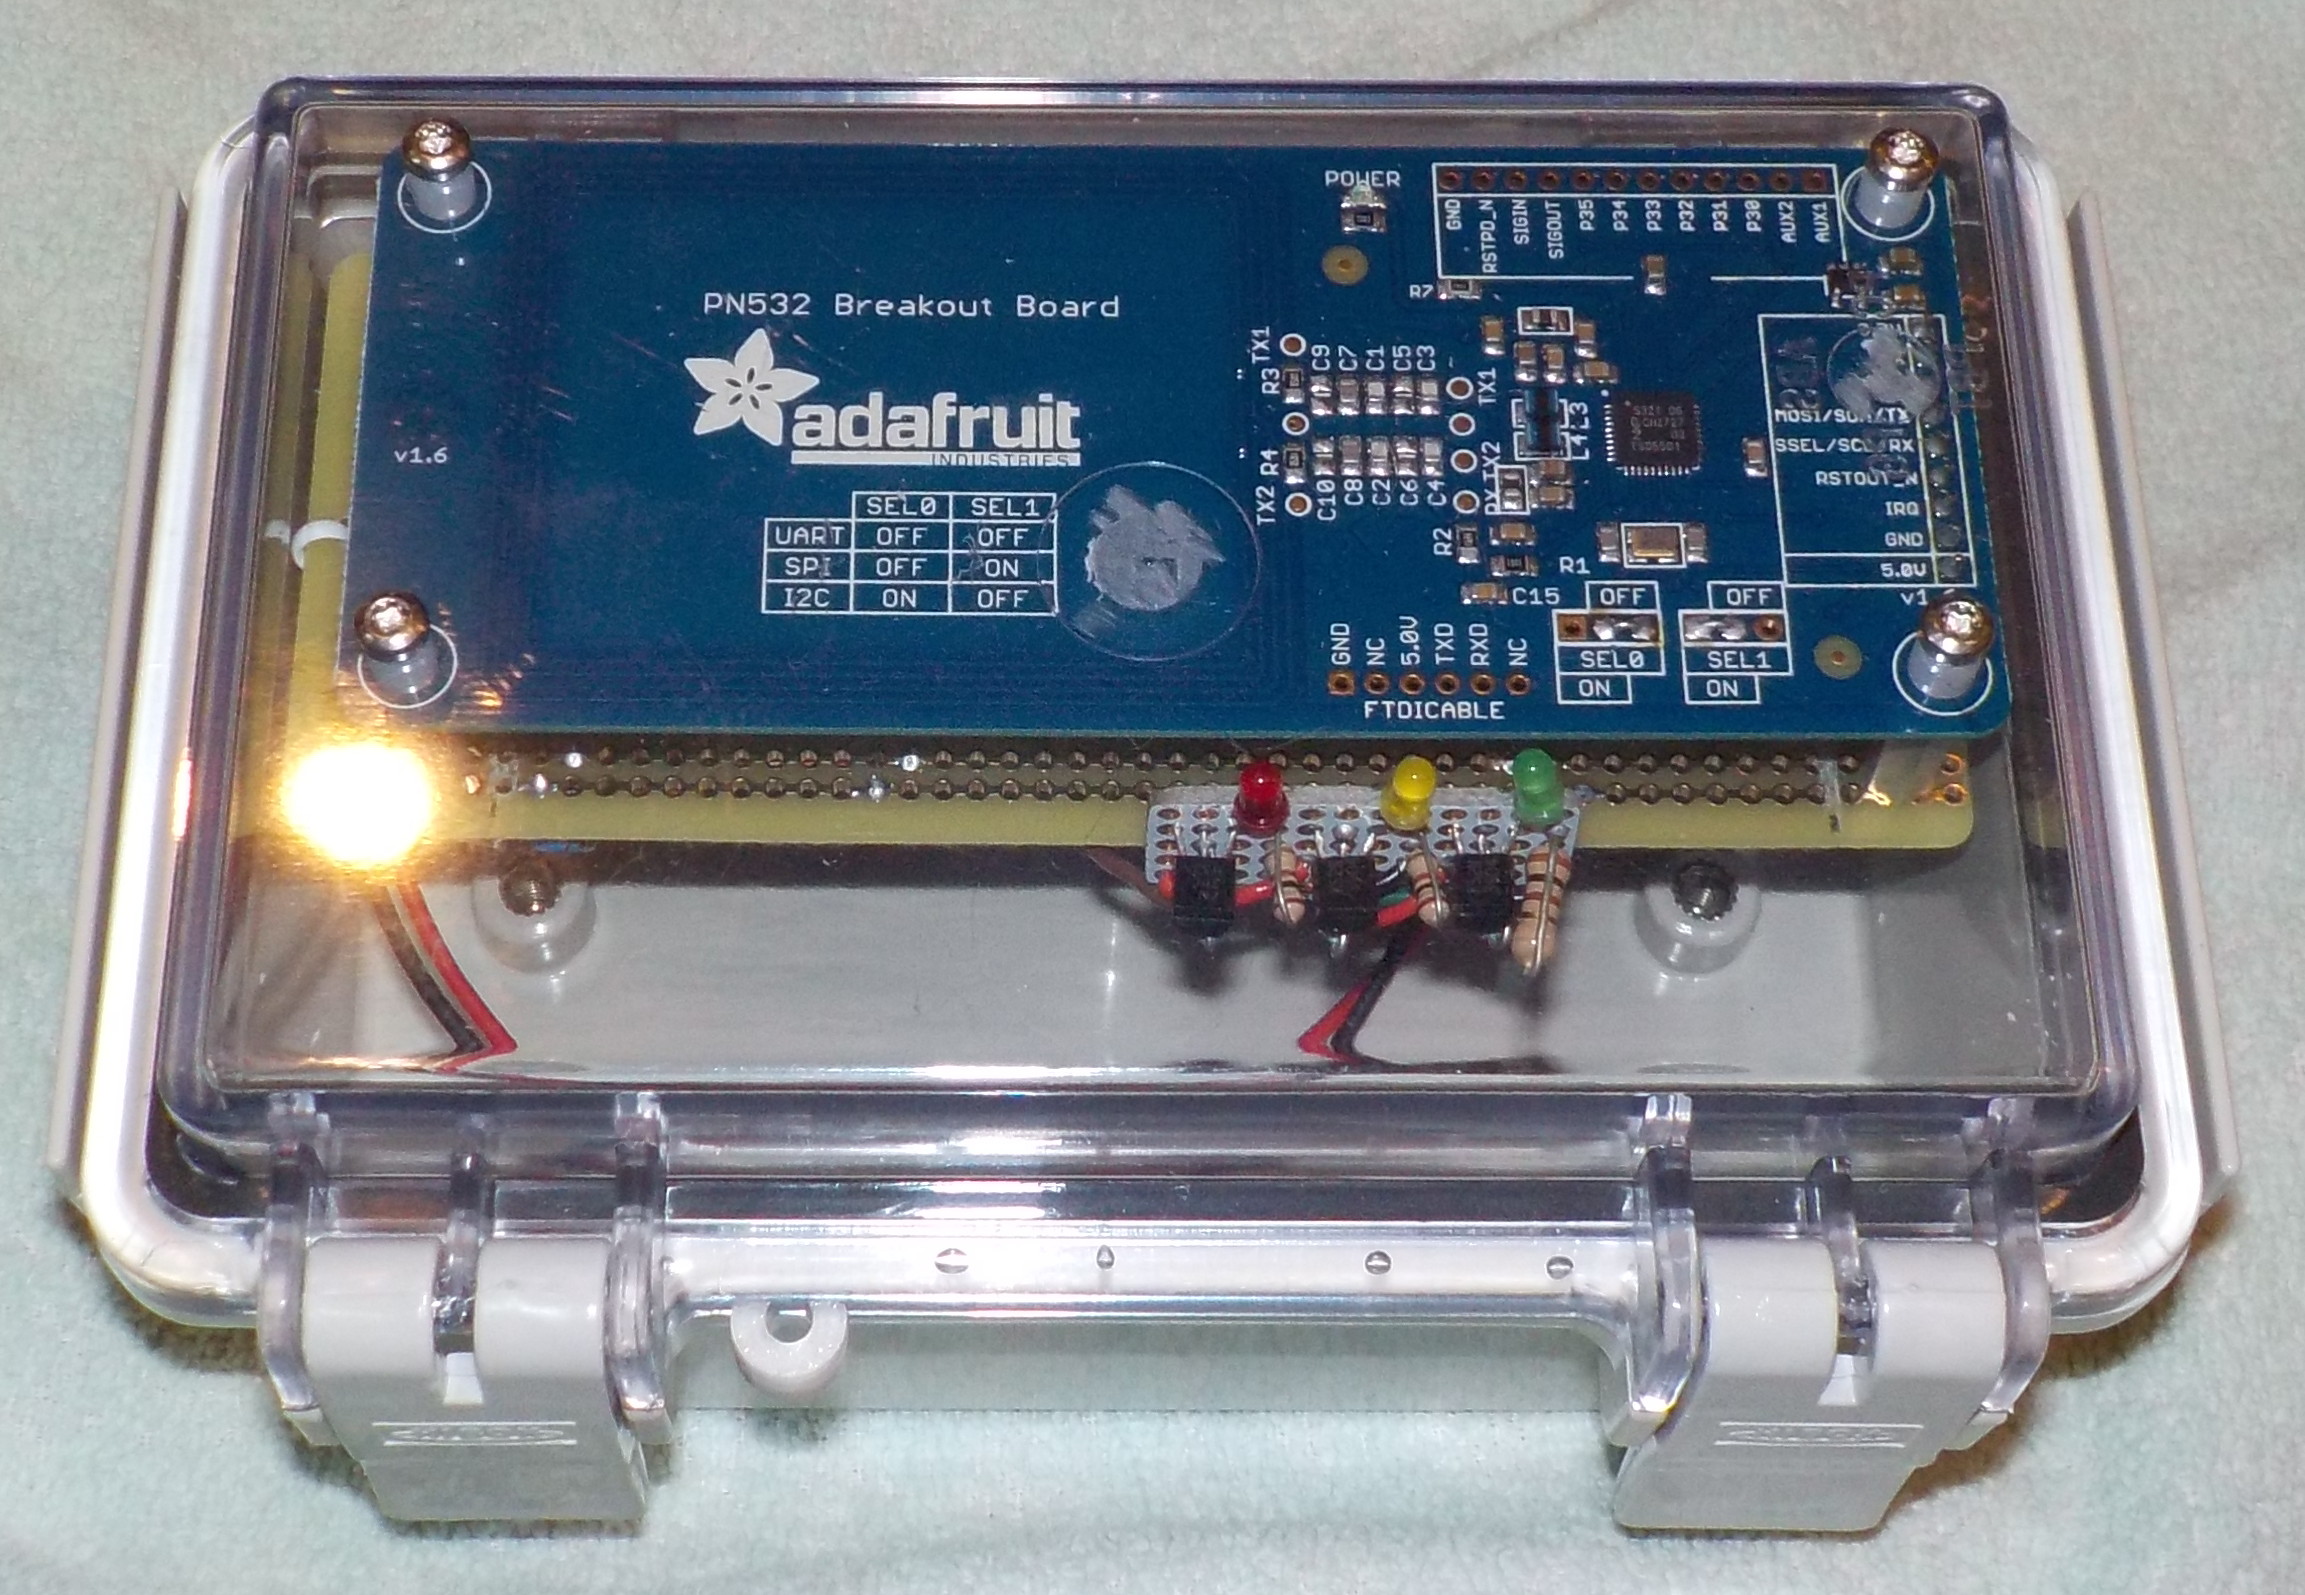
Fig. 1. Fox box outside. The RFID reader/writer and three LEDs can be seen.
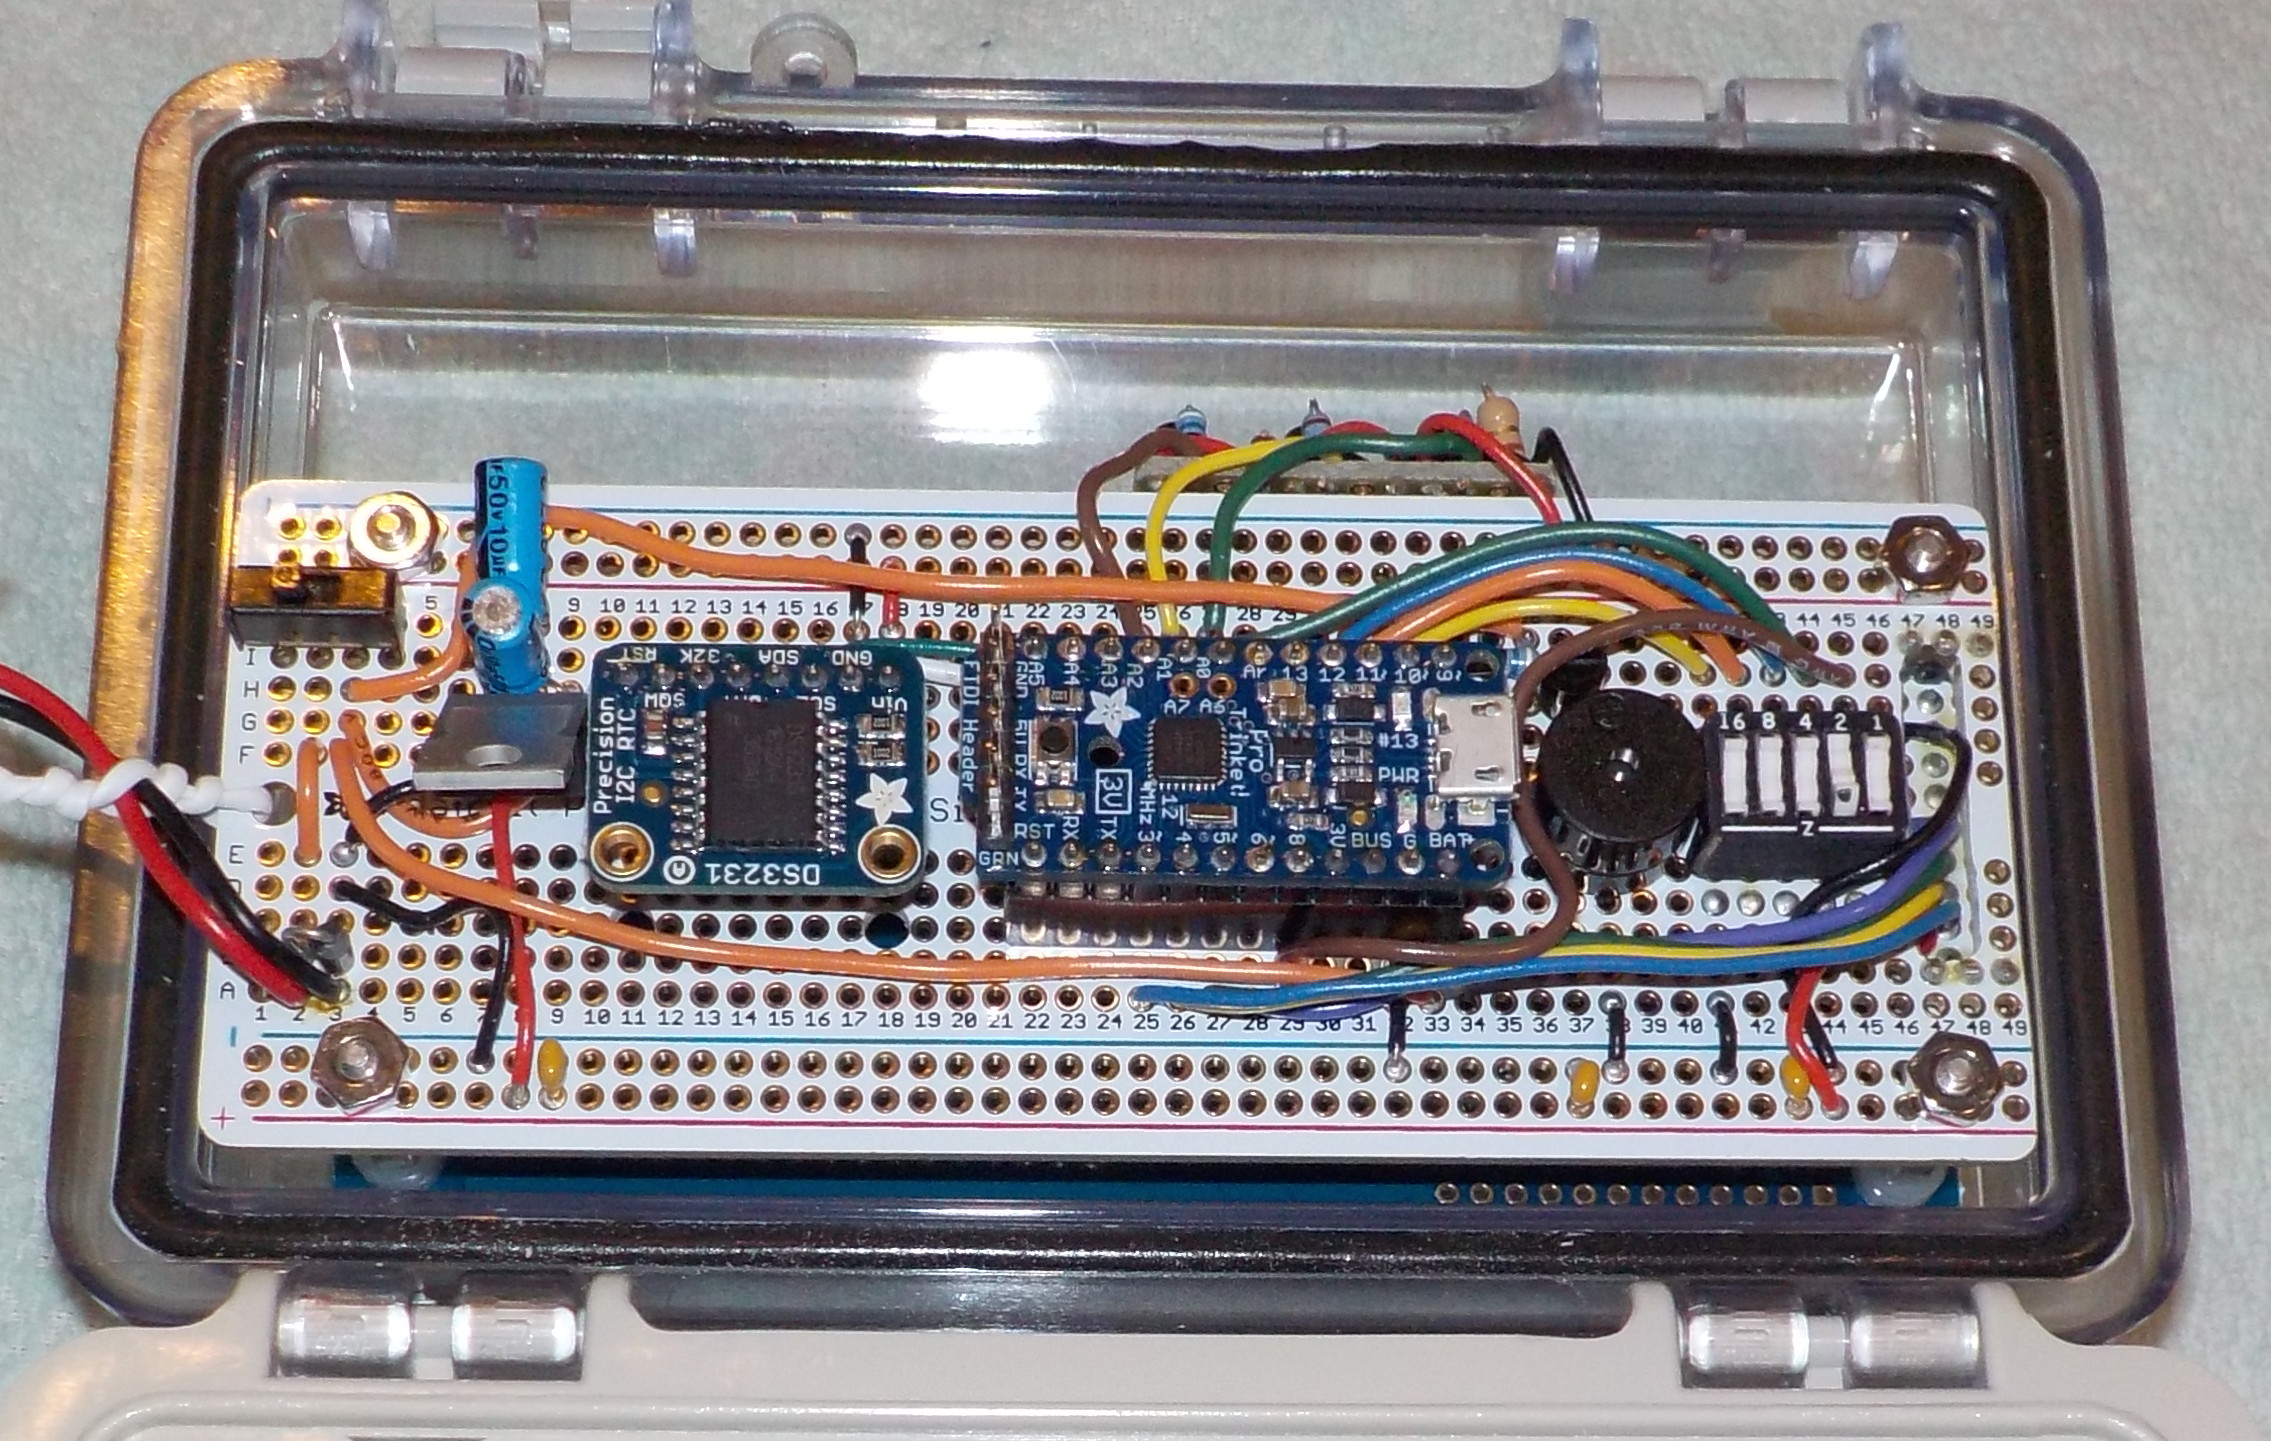
Fig. 2. Fox box inside top cover. The top cover holds all the electronics. The bottom only holds the batteries. From left to right, we can see the power switch, the 3.3 V voltage regulator, the RTC module, the microcontroller module, the piezo buzzer, and the switches. To the right of that, but difficult to see, is a cut out in the proto-board through which wires access a header for the RFID module.
The master box.
The master box can operate in a number of modes which determine what will happen when a card is placed over the RFID reader/writer. Depending on the mode, it will read the information on the RFID card and store it on an SD card, display the information on the LCD, wipe the RFID card of all information, or act as a fox box.
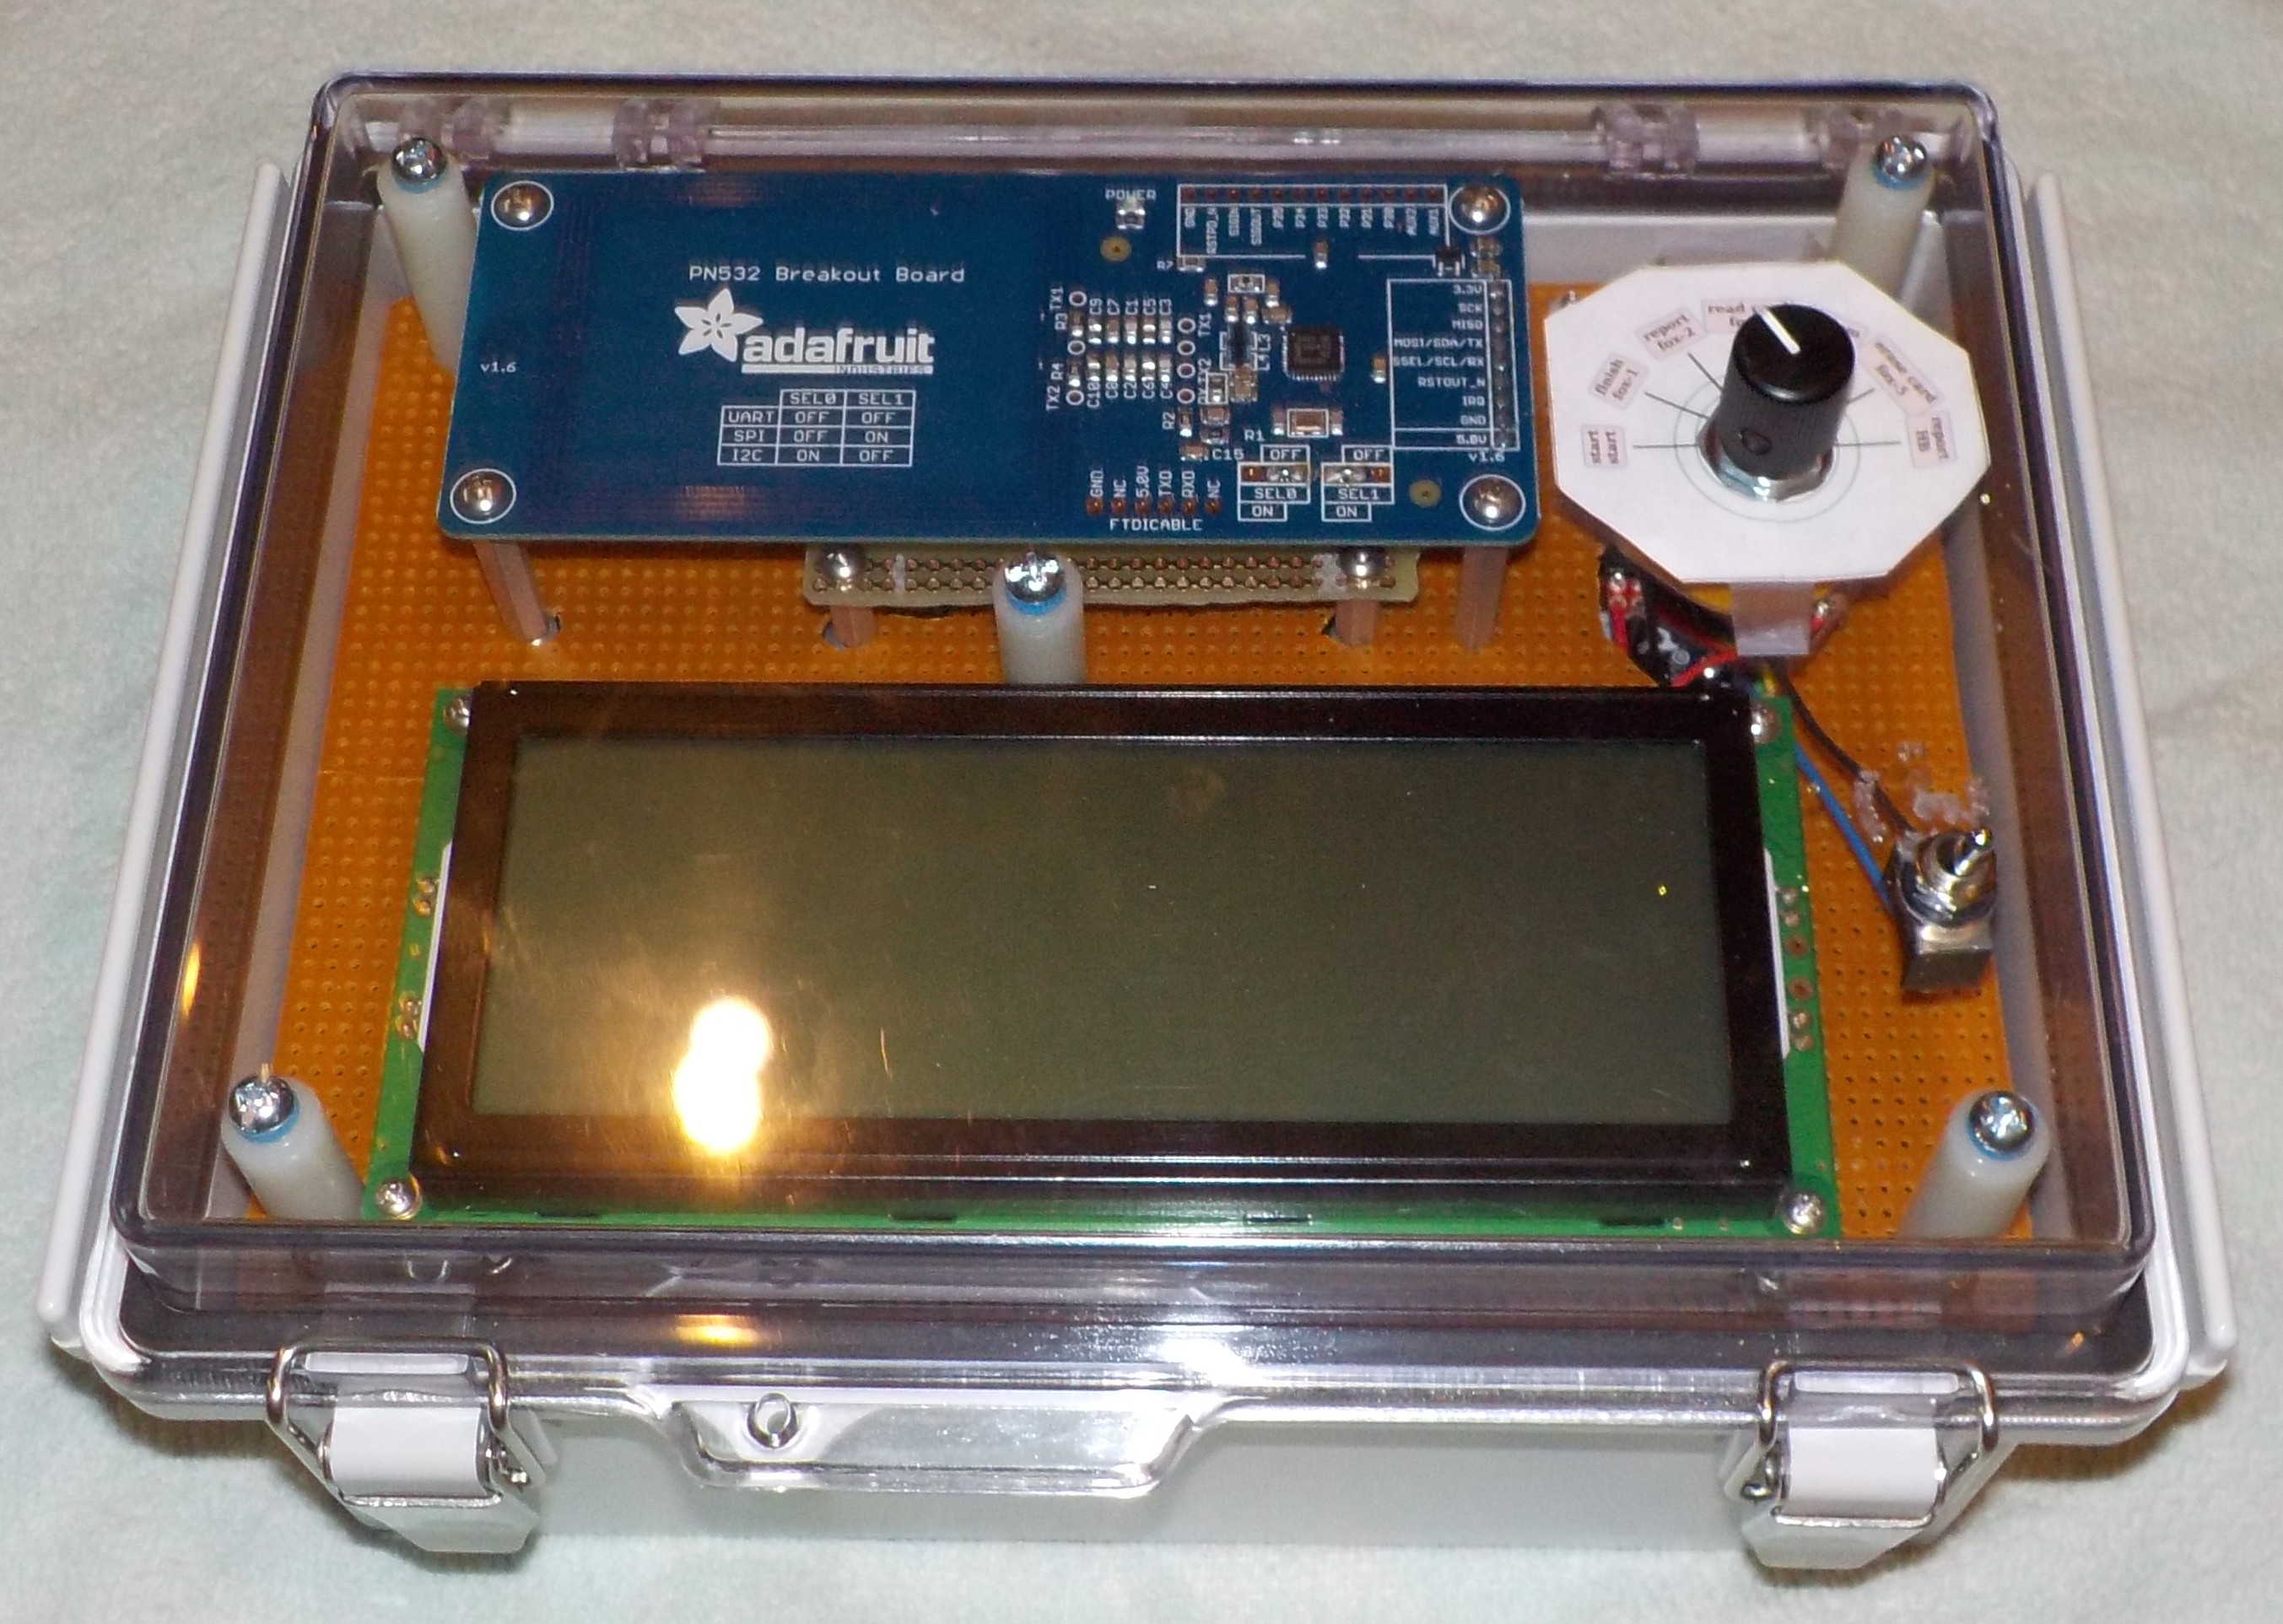
Fig. 3. Master box outside. From outside, we can see the RFID card reader/write (top-left), the LCD (bottom), a 7-position rotary switch (top-right), a toggle switch (bottom-right). The two switches are used in combination to set the mode.
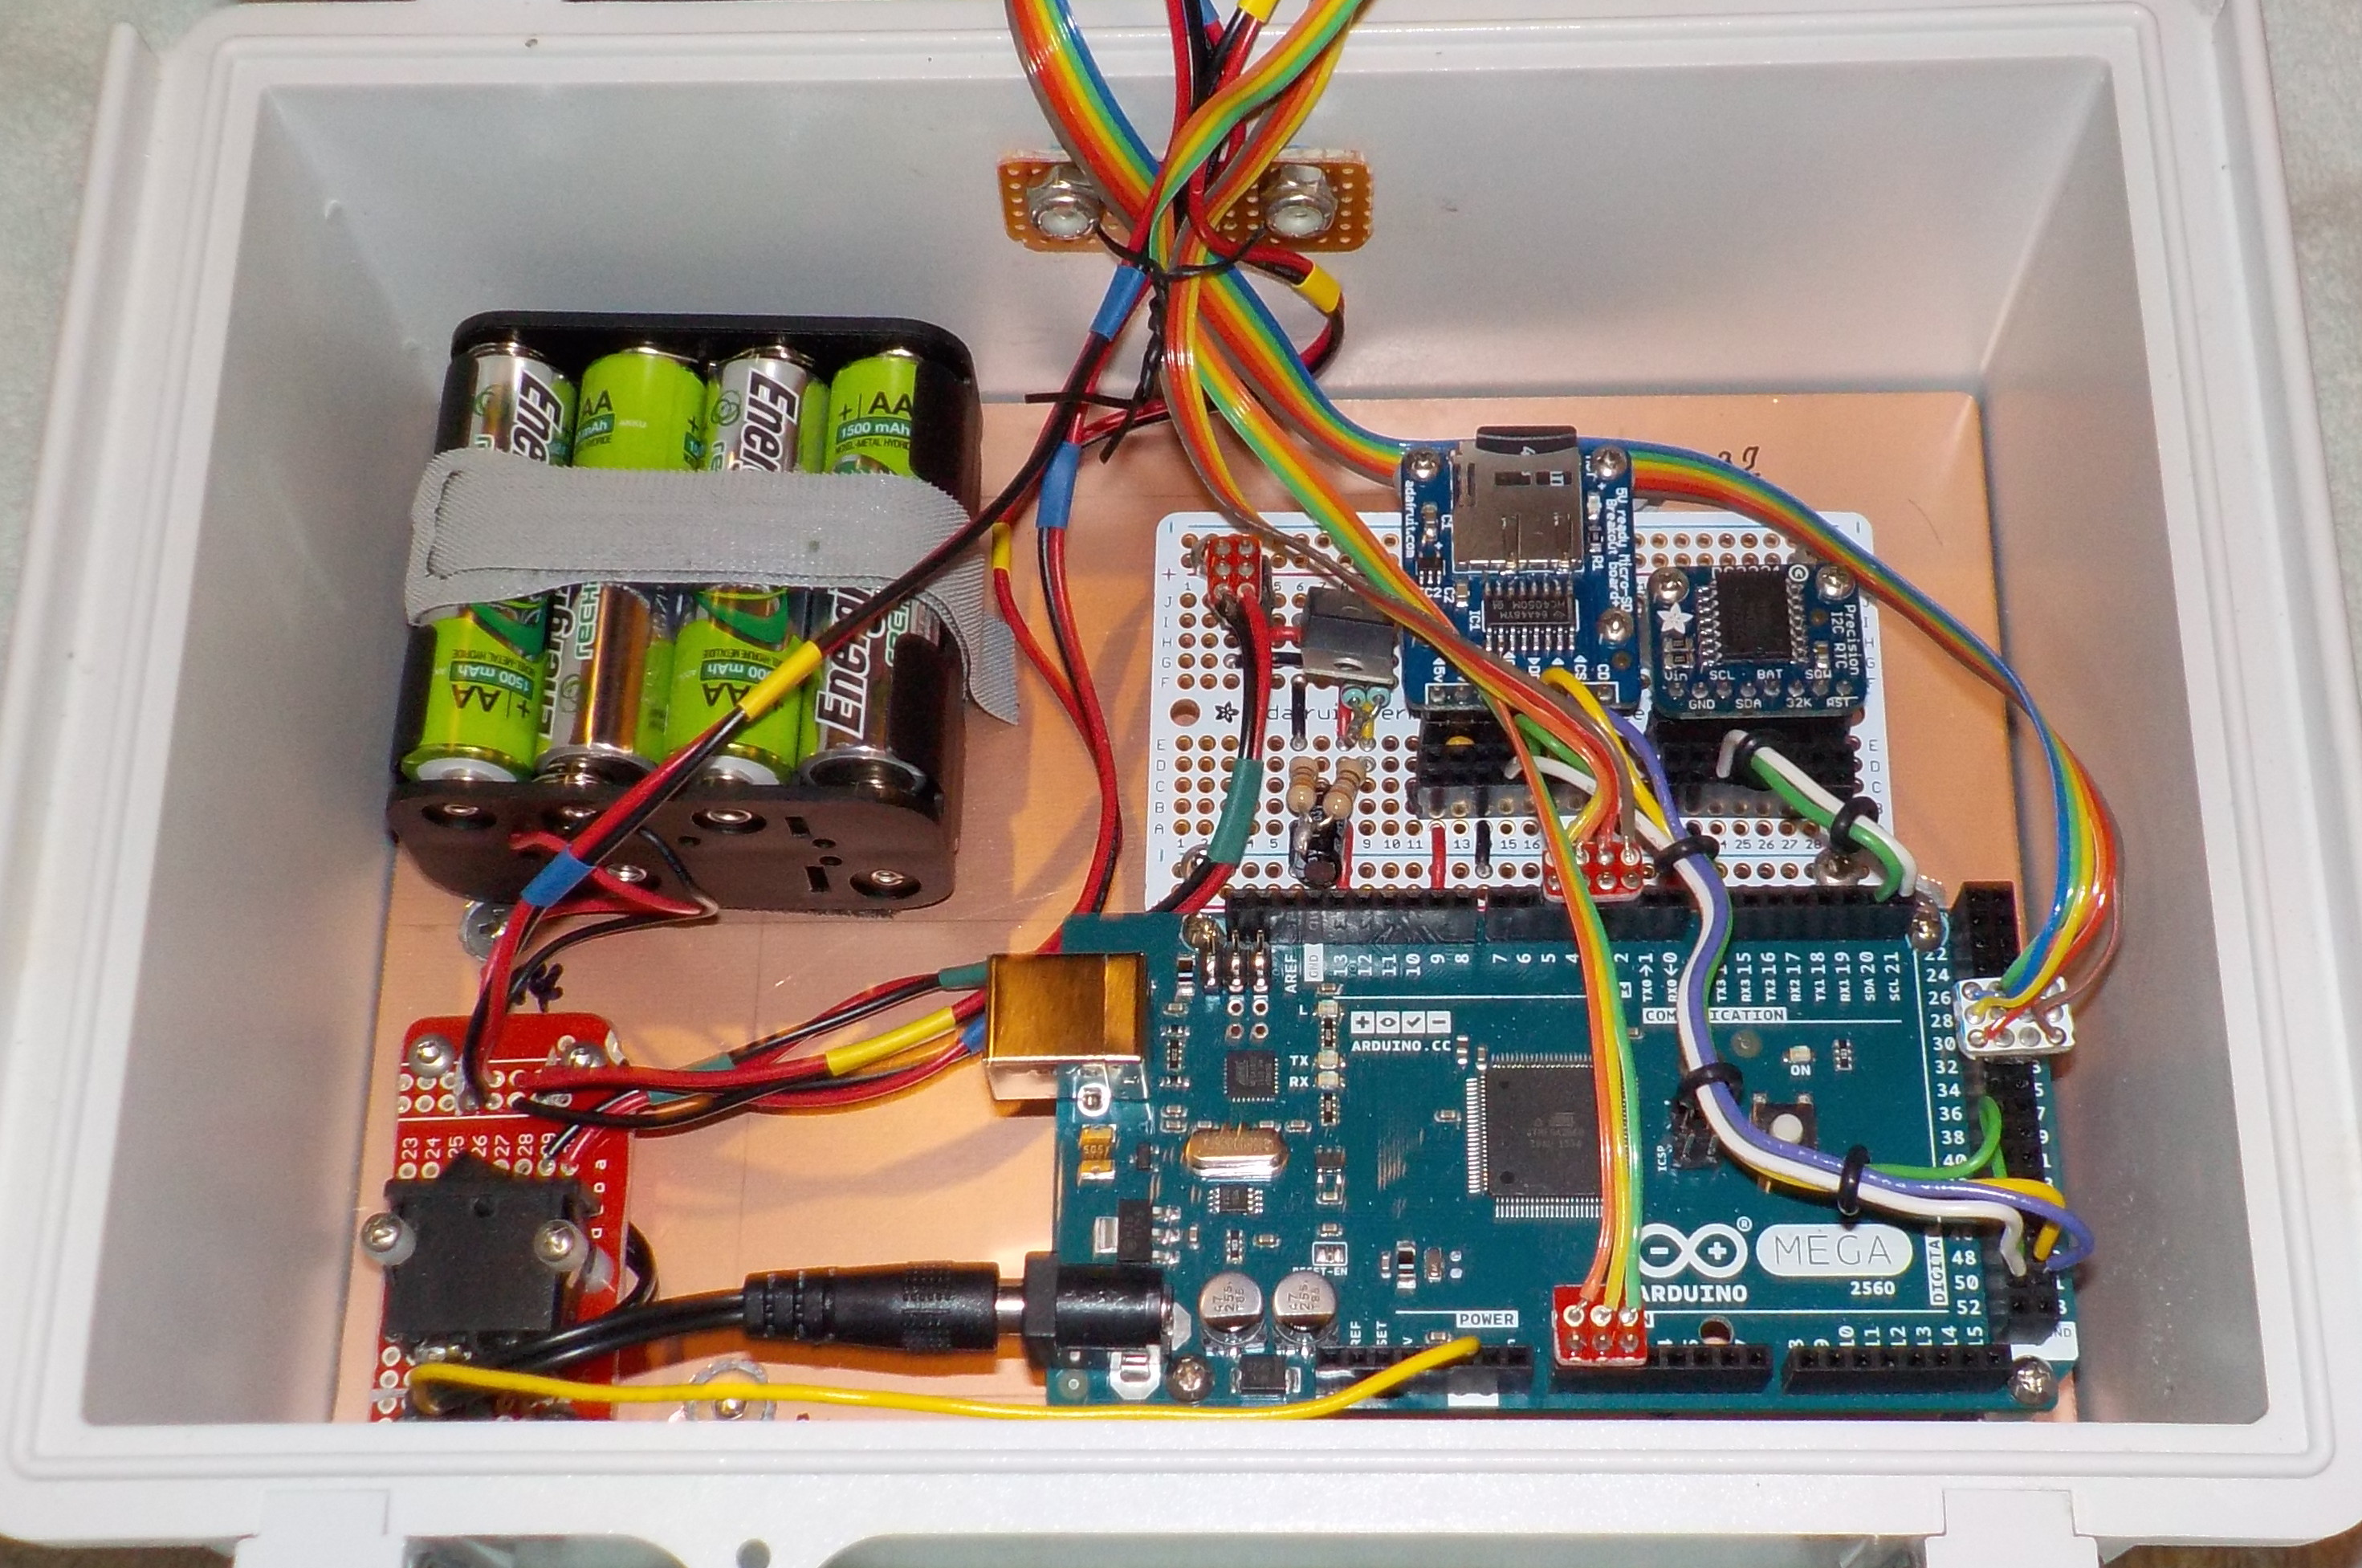
Fig. 4. Master box inside, bottom. In the bottom, we have the battery pack (top-left), the power switch and power distribution board (bottom left), the microcontroller board (bottom-right), the proto-board with the SD card and RTC modules (top right).
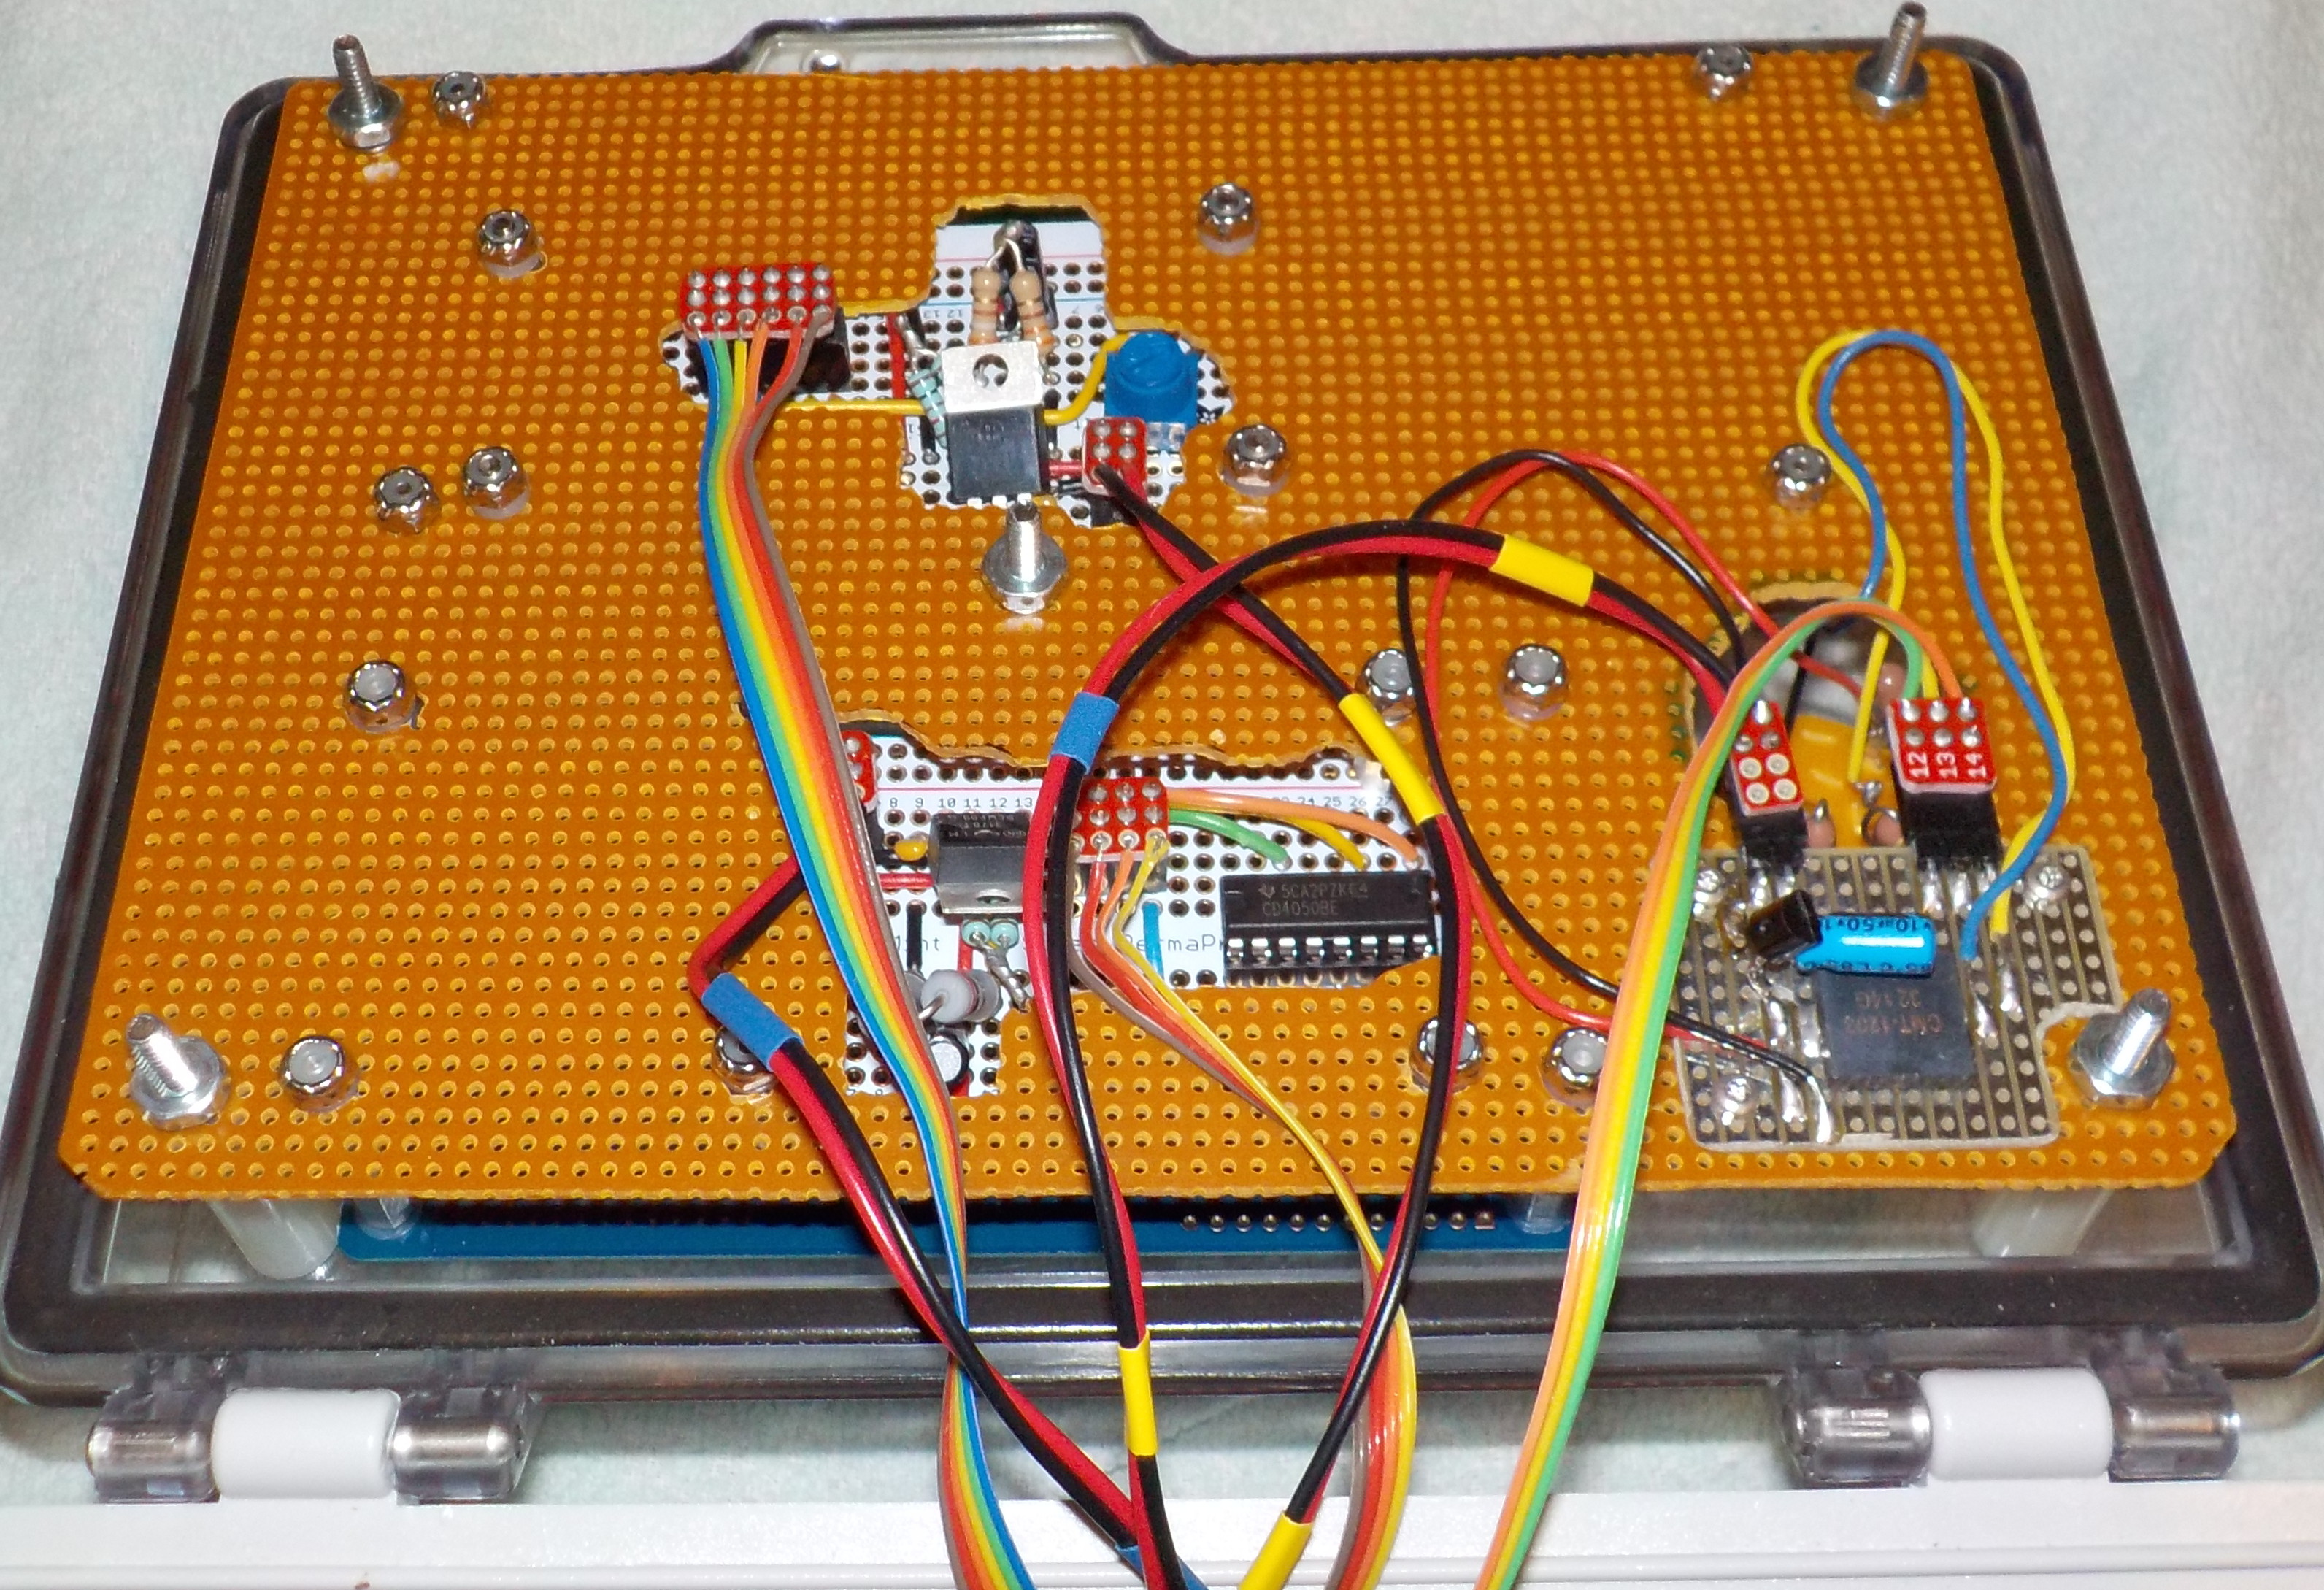
Fig. 5. Master box inside, under top cover. Most of the modules under the top cover are masked by a peice of perf board that holds everything at the correct height. Through cut-out sections of the perf board, we can see the LCD control board (top), the RFID control board (bottom), and the switch control board (bottom right). The 16-pin DIP (CD4050) on the RFID board is a voltage converter (5 V / 3.3 V). The flat black square on the switch control board (under the bright blue electrolytic cap) is an SMT piezo.