72 — ARDF 101 - Quick Notes for 80 Meters.
2016-05-15. By Kelly.
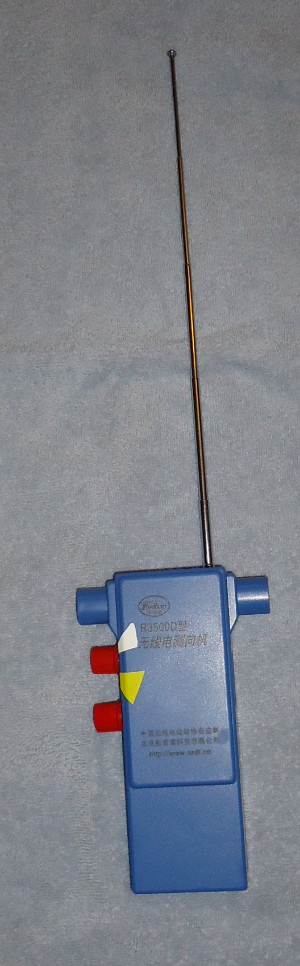
Fig. 1. One of the 80m receivers, antenna extended.
ARDF Receiver Getting Started
- At the top of the receiver is an antenna. Carefully extend the antenna (Fig. 1).
- The receiver has two knobs on one side.
- The top knob is for tuning into the frequency of the transmitters which include the homing beacon and the foxes.
- The top piece of tape (Fig. 2) marks the homing beacon and the lower one (Fig. 3) marks the foxes. But note that this will depend on the frequencies used. Check where the homing beacon and foxes are during the pre-event class.
- The lower knob is the volume. Make sure the volume is low before plugging in your headphones.
- Plug in your headphones to listen.
Listening for Homing Beacon Transmitter
- Set your frequency knob to the homing beacon frequency and listen.
- Slowly move your receiver from side to side until you hear the homing beacon.
- You should hear beeps (Morse code) coming from the homing beacon.
- If you do not hear the homing beacon, make slow and small adjustments to the frequency knob until you hear a signal.
- The homing beacon is on continuously in the ARDF event and is used to guide you home.
Listening for the Fox Transmitters
- Now set your frequency knob to the other marked setting.
- If you face south and listen you should be able to hear a fox. Each fox only sounds for a minute. The fox starts with an MO in Morse code. It starts with two long tones, then three long tones. Then ends with a number of beeps that correspond to the fox's number.
- Holding your receiver in front of you slowly move the receiver from side to side.
- If you do not hear the fox increase the volume.
- If you still do not hear the fox make slow and small adjustments to the frequency knob until you hear a signal.
- There are five foxes. Each fox will sound for one minute and be identified with the number beeps following the MO. For example fox #1 will play the first minute for one minute followed by fox #2 which will play for one minute and then fox #3, fox #4, and fox #5. Then it repeats with fox #1 again.
How do I know what direction to go to get the fox?
- You know the general direction of the foxes by using the sweeping motion done earlier (Listen For The Fox)
- Turn the transmitter sideways and slowly move your receiver from side to side, just as you did earlier. But this time you will notice there is a precise direction in which you can't hear the fox. This is called the null and that is where the fox is.
- The null allows you to get a more precise reading of the fox. Now look at your map and try to guess where the fox is hiding.
- But what if you are in the woods and you don't know if the fox is behind or ahead. That is what the sense button (Fig. 4) is for.
- Look where you think the fox is and hold the receiver in front of you so that you can see the front. Now press the sense button on the side, listen for the fox, and note how loud it is. Now turn the receiver so you are looking at the back of the receiver. If the fox now sounds weaker, you are looking in the right direction. If the fox sounds stronger (louder), the fox is behind you.
Maps -- Know an Easy Bearing to Return to the Meeting Place
- First know the safety bearing for the event. This is the direction to take if you get lost.
- Then plan your course through the woods.
- Think of good strategies for navigation. For example towards Bolin Creek is downhill and towards the power line/service road is uphill.
- Look for the red triangle (Fig. 5) on the map that indicates your starting position.
- Make sure to orient your map and compass so you can see where you are in relationship to the ARDF course.
- Look for major features like rivers and power lines so that you can orient your position on the map as you go.
- As you gain experience, you will be able to recognize more land features and your navigation speed will increase.
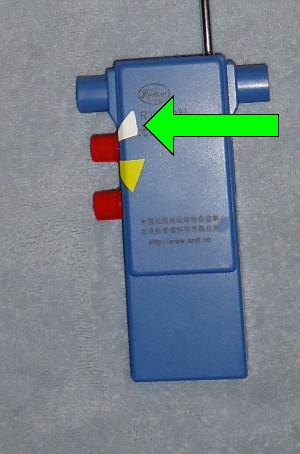
Fig. 2. Tape we placed to mark the frequency of the homing beacon. Remember, these positions may be different at different events.
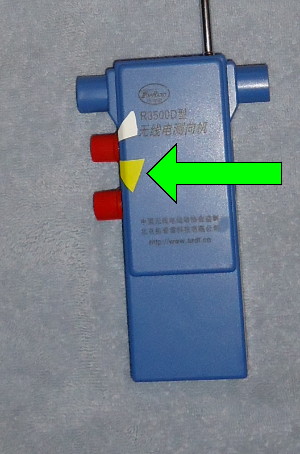
Fig. 3. Tape we placed to mark the frequency of the foxes. Remember, these positions may be different at different events.
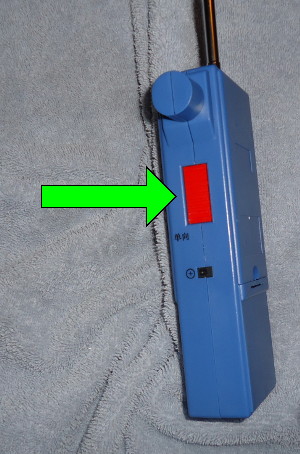
Fig. 4. Sense button.
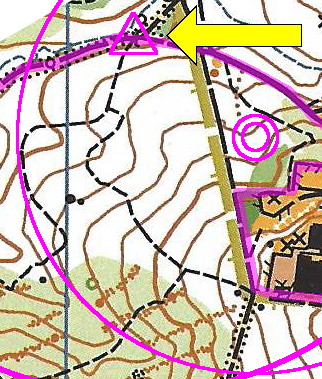
Fig. 5. Part of the map from our Apr-30 meet. The triangle marks the start.