71 — Course setting for our first full ARDF course.
2016-05-08. By Patrick.
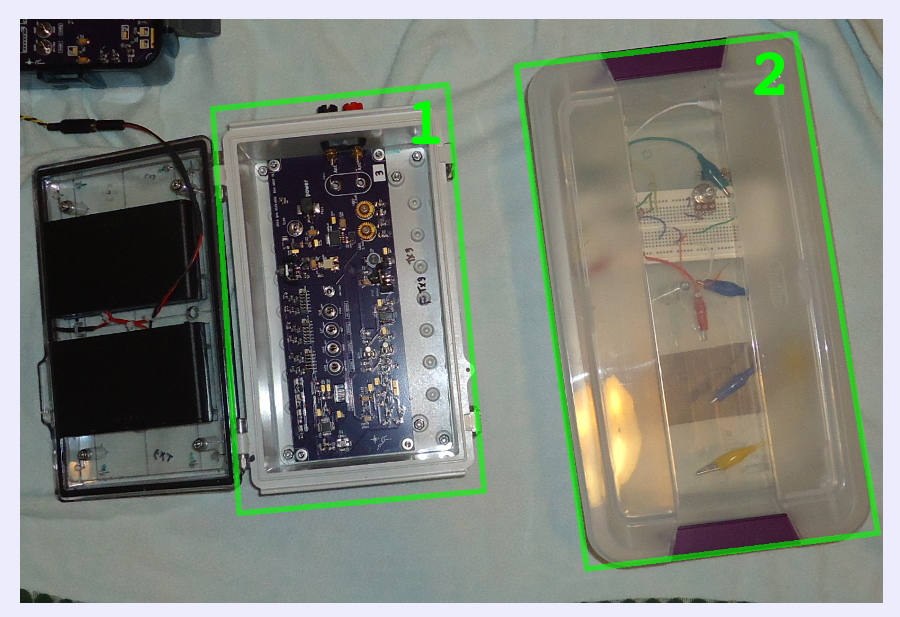
Fig. 1. [1] The bottom of one of the transmitters in a nice new enclosure. [2] A thin plastic box we are using to develop electronics projects. It's the same type as was for for two of the transmitters that are now in the new enclosures. The thin plastic is nice for development but, when it came time to run a real event, they were just too big and too fragile. During the Mar-28 event, I had to leave them at the main meeting place and do a second trip to place them.
On Saturday 04-30, just a week ago, we directed our first full-course 80m ARDF event for the school. By full-course, I don't mean full length. Rather, I mean that there were five controls and a homing beacon as there would be in a classic event. The course was shorter than in a classic. The students are young and none of the students nor any of the family members had done a real ARDF course before.
But the course was more than just foxes and a homing beacon in the woods. We want to get the students used to the feeling of running in a championship event. So we had other features of a real ARDF event. We had timed starts at five minute intervals and a starter box sounding off one minute warnings and start times. We had a finish shoot with a bell at the end.
A bell? Well, we don't have a SportIdent type system. That's still too expensive at this time. So each of the controls had a bunch of paper tags attached to the flag. A participant would rip off a tag when they found a control and bring it back with them. Like that, we could verify the controls they had visited. In a real ARDF event, there is a punch at the homing beacon and another one at the end of the finish shoot. So we put paper tags on the homing beacon flag and a bell at the end of the finish shoot. When the student rings the bell, we note that as their finish time. Fun for the students and the spectators, and really handy for us!
It's the course setting that brought some surprises. Kelly is recovering from two foot injuries and couldn't run in the woods. No problem - we figured that I would do the course setting while she set up the main meeting place, finish shoot, and other stuff. When I got back, I would help finish setting up the meeting place. Then we would go out for a coffee and still have time to get back for the arrival of the participants around 0900.
Big mistake. I don't remember how much time we had planed for the course setting. I think it was around 90 minutes. Actually, around 0920 I was finally running in to the meeting place. Fox-1 and the homing beacon were still not set. Kelly had not yet finished the setup when the students and families started arriving. When I arrived, she had signed-in everyone and was well into the orienteering and ARDF classes.
Everything had taken longer than expected. But the real biggy was setting up the antennas. The verticals were only 6m but getting them setup still took a fair bit of time. More than I had realized from trials we had done. It's one thing to have everything ready for a trial setup, put up an antenna, and note how long it takes. It's another one to have all the stuff in a backpack, pick the right area in a location you haven't seen before, untangle everything, put up the antenna, and pack the rest back in the backpack. There are six of them to place. So if you take ten minutes longer than you expected, you just added one hour to your setup time. Also, during trial setups, you keep changing how you do things until you figure out an efficient system. In actual course setting, you may encountered some problem that needs to be solved immediately - a connector breaks, a wire gets hung up on a branch that's too low and you can't get it down, a pole gets stuck. If any one of these takes 15 minutes to solve and you only encounter two problems, you just added 30 minutes to your course setting.
In the end it all worked out. Participants went out after I had set the homing beacon. Fox-1 was set a bit late but it was found by one of our teams. Everyone came back happy, having learned a lot, and having had a good time.
For next time, we're making a number of changes to the equipment to speed course setting. Some of these are shown in the figures. Also, we'll know to plan more time for the setup. We'll be ready.
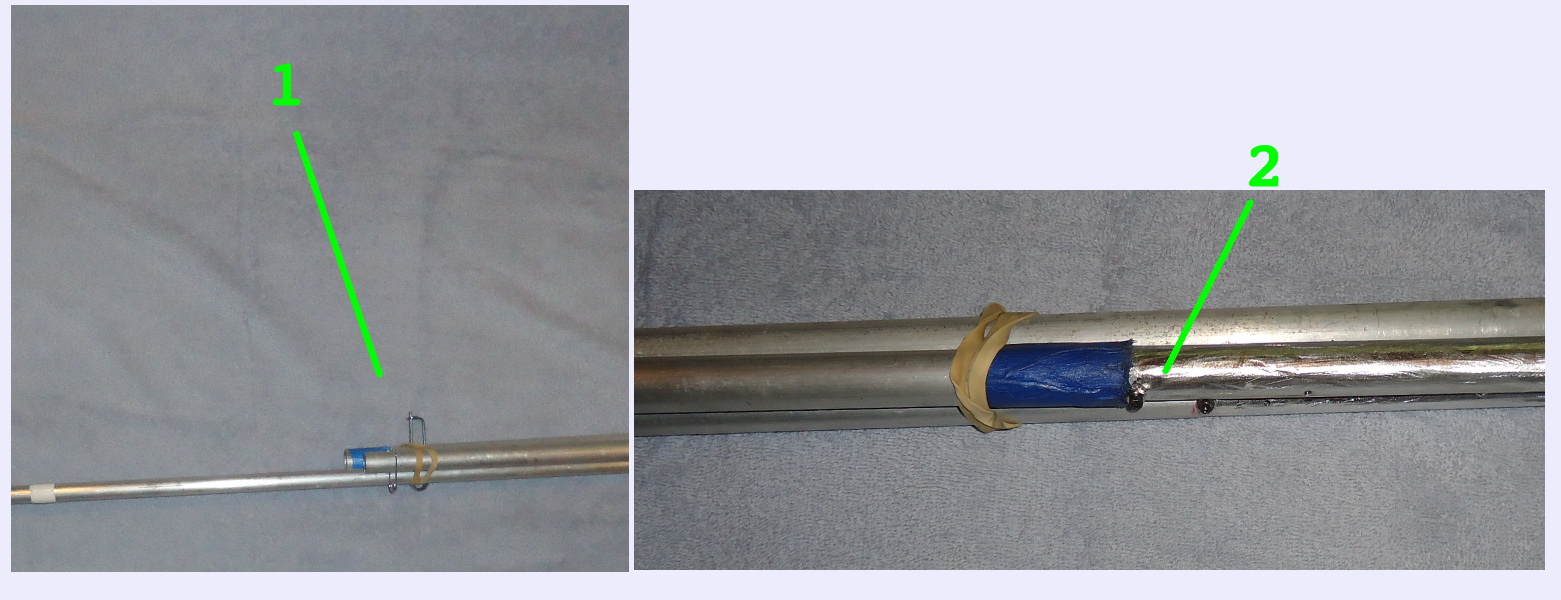
Fig. 2. Parts of the pole we use to place the 6m vertical section of the antenna system. The pole is in three parts and held together with rubber bands for running in the woods. The pole was definitely faster than shooting a fishing line with a toy sling shot. But a couple things still took extra time during the last event. The pole jammed once. That took up a bit of time. And the top section sometimes was loose enough that I was afraid it would get hooked on a high branch and pull out. The new system has pins [1] that prevent it from pulling out while assembled. And there are screws [2] tapped into the side that fit into slots on the adjoining pole section to align the pin holes. The screws also prevent the pole sections from going too far and jamming.
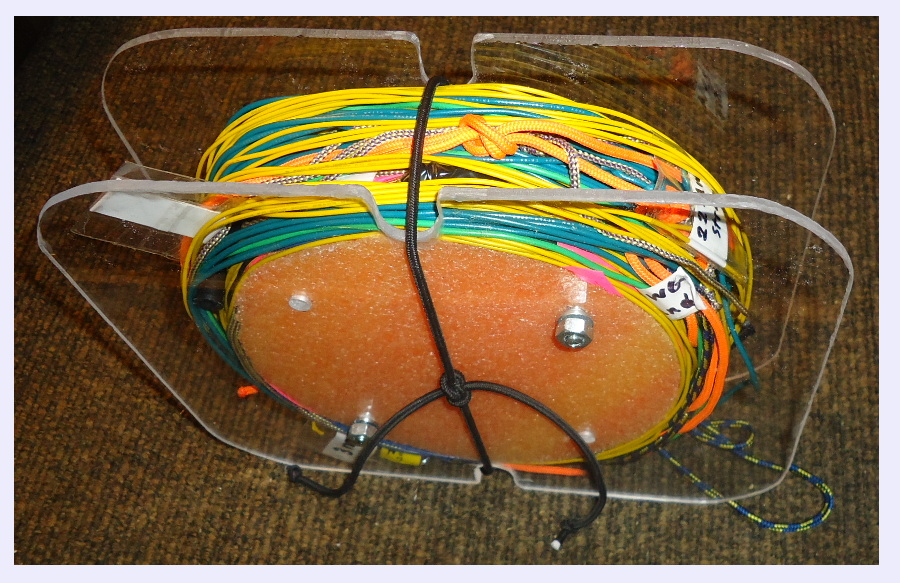
Fig. 3. A spool for the radials. Another problem in the last event was the radials being slow to unpack. Each set of three radials was in a separate bag. The verticals were wound on a single spool and were much faster to flake out. So now we have a spool for the radials also. It is built from two pieces of acrylic with foam in the center. The bungee is just a loop to hold the radial ends in.
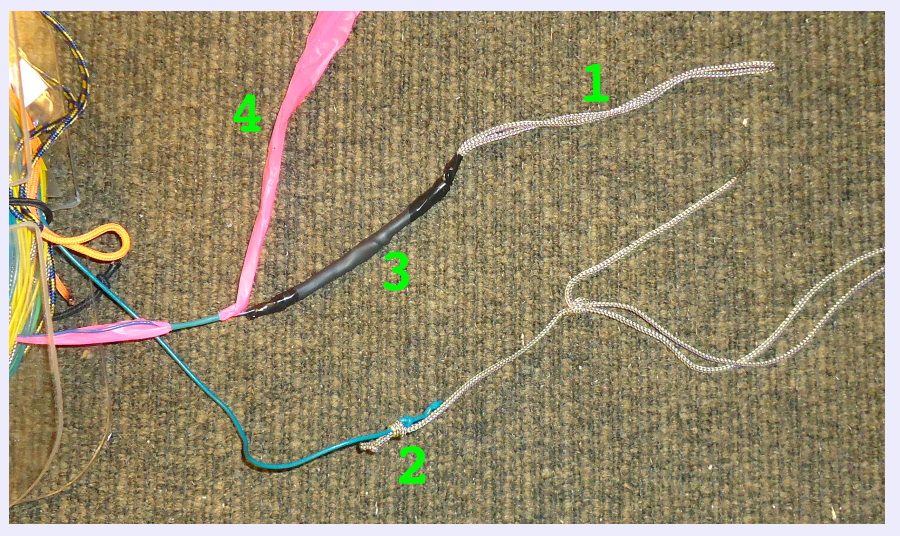
Fig. 4. Changes to radial ends. Each radial has a string loop at the end. This makes it super easy to extend them out. We just find a medium sized stick, put it through the loop, and set it on the ground. It's enough to straighten the radial but loose enough that someone is unlikely to be brought down by tripping on it. During the last event, the loop forming knots [2] kept catching on each other and caused plenty of tangles. Now we're covering them with shrink tubing and tape [3]. So far, it looks like this will help. Also, some of the radials were a bit hard to see. So we're adding flagging tape [4] to them.